-
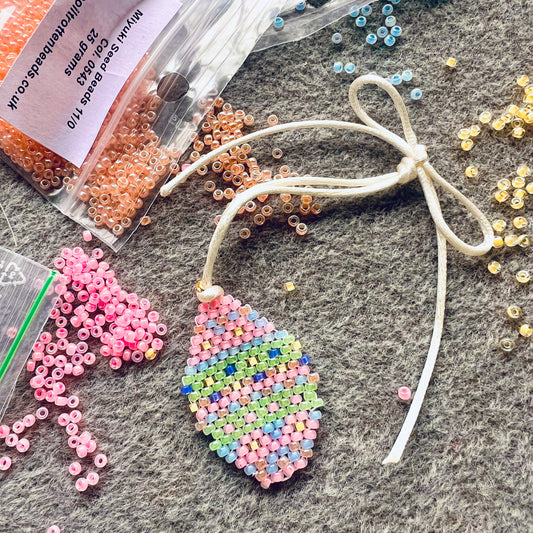
St Petersburg Egg Charm - Free Easter Delica Beading Pattern Download
Regular price From £0.00Regular priceUnit price per -
Flower Power Earring Pattern by Leslie Pope - Instant Download or Printed Copy
Regular price From £0.00Regular priceUnit price per -
Seed Bead Four Leaf Clover Pattern by Kerrie Slade for Preciosa - Instant Download or Printed Copy
Regular price From £0.00Regular priceUnit price per -
Forget Me Not Brick Stitch Pattern - Instant Download or Printed Copy
Regular price From £0.00Regular priceUnit price per -
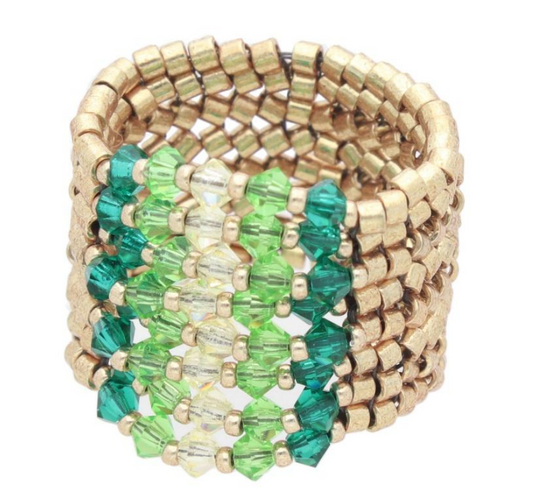
Irish Meadow Ring Pattern by Leslie Pope - Instant Download or Printed Copy
Regular price From £0.00Regular priceUnit price per -
Beaded Daffodil Earring Pattern by Marianne - Instant Download or Printed Copy
Regular price From £0.00Regular priceUnit price per -
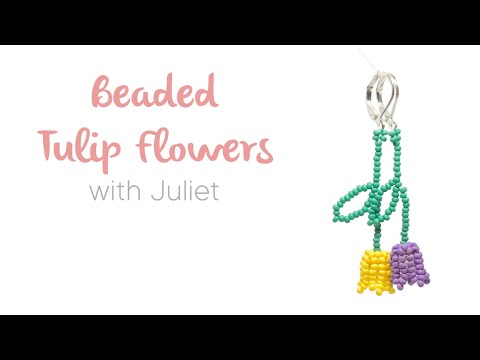
Beaded Tulip Earring or Pendant Pattern - Instant Download or Printed Copy
Regular price From £0.00Regular priceUnit price per -
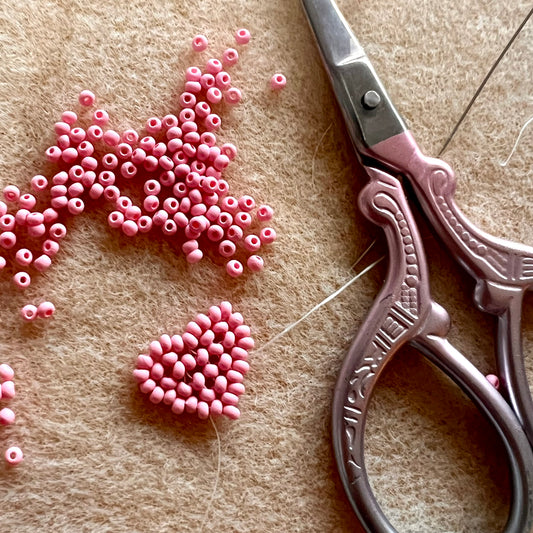
Simple Heart Ring Pattern by Hannah - Instant Download or Printed Copy
Regular price From £0.00Regular priceUnit price per -
Preciosa Beaded Heart Pattern - Instant Download or Printed Copy
Regular price From £0.00Regular priceUnit price per -
Hearts and Kisses Loom Bracelet Pattern by Leslie Pope - Instant Download or Printed Copy
Regular price From £0.00Regular priceUnit price per -
Flora Pendant Pattern by Barbara Lepak - Instant Download or Printed Copy
Regular price From £0.00Regular priceUnit price per -
Charlotte's Christmas Tree Earring Pattern - Instant Download or Printed Copy
Regular price From £0.00Regular priceUnit price per -
Kumihimo Christmas Wreath Bracelet Pattern - Instant Download or Printed Copy
Regular price From £0.00Regular priceUnit price per -
Tom Turkey Earring Pattern - Instant Download or Printed Copy
Regular price From £0.00Regular priceUnit price per -
Pumpkin Pearl Earring Pattern - Instant Download or Printed Copy
Regular price From £0.00Regular priceUnit price per -
Asteri Ornament Pattern - Instant Download or Printed Copy
Regular price From £0.00Regular priceUnit price per -
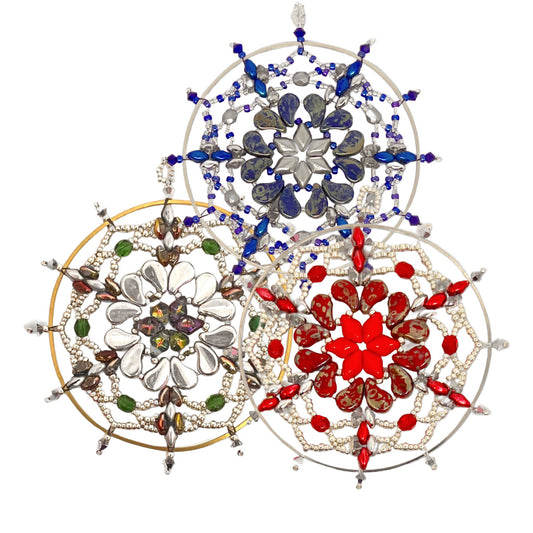
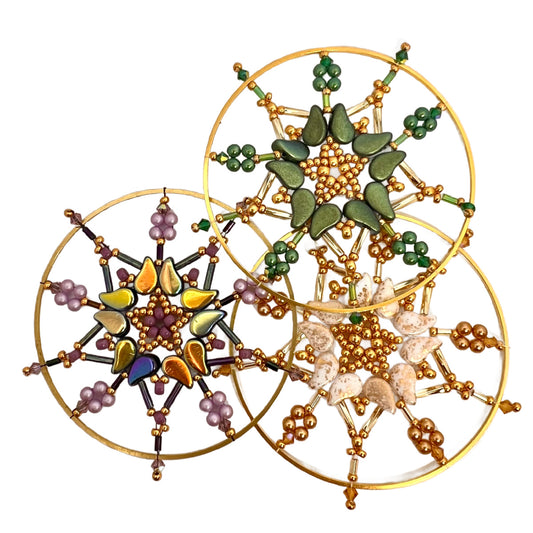
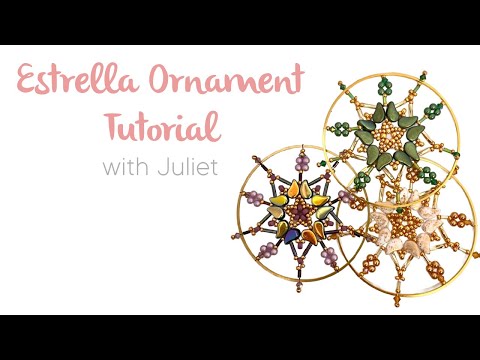
Estrella Ornament Pattern by Vivien Hussey - Instant Download or Printed Copy
Regular price From £0.00Regular priceUnit price per -
Georgiana Bracelet Pattern by Carolyn Cave - Instant Download or Printed Copy
Regular price From £0.00Regular priceUnit price per -
Rosita Necklace Pattern - Instant Download or Printed Copy
Regular price From £0.00Regular priceUnit price per -
Right Angle Weave Crystal Cuff Pattern – Instant Download or Printed Copy
Regular price From £0.00Regular priceUnit price per -
Peyote with a Twist Pattern - Instant Download or Printed Copy
Regular price From £0.00Regular priceUnit price per -
Bezelling with Cubic Right Angle Weave Pattern by Susie Hoad - Instant Download or Printed Copy
Regular price From £0.00Regular priceUnit price per -
Bridge Over Troubled Water Pattern by Susie Hoad - Instant Download or Printed Copy
Regular price From £0.00Regular priceUnit price per -
Reversible Bracelet Pattern by Susie Hoad - Instant Download or Printed Copy
Regular price From £0.00Regular priceUnit price per -
Wheel of Fortune Pattern by Bianca van der Molen - Downloadable
Regular price From £0.00Regular priceUnit price per -
Snowflake Cuff Pattern by Sue Picknell - Downloadable
Regular price From £0.00Regular priceUnit price per -
Pure Vitality Stacking Bracelet Pattern - Instant Download or Printed Copy
Regular price From £0.00Regular priceUnit price per -
GemDuo Rope Pattern - Instant Download or Printed Copy
Regular price From £0.00Regular priceUnit price per -
Bugle Spiral Rope Pattern - Instant Download or Printed Copy
Regular price From £0.00Regular priceUnit price per -
Reflections Netted GemDuo Bracelet Pattern – Instant Download or Printed Copy
Regular price From £0.00Regular priceUnit price per -
Owl and Pussycat Needlecase Pattern by Susie Hoad - Instant Download or Printed Copy
Regular price From £0.00Regular priceUnit price per -
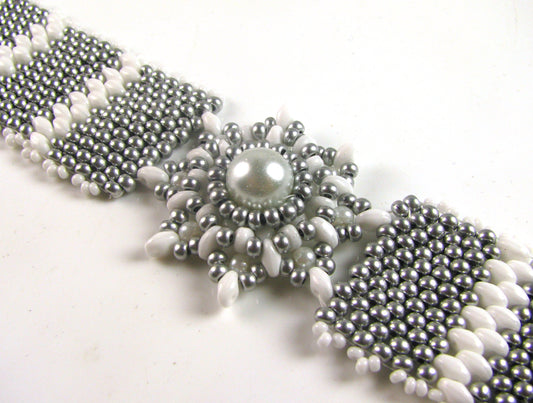
L'amore Bracelet Pattern - Instant Download or Printed Copy
Regular price From £0.00Regular priceUnit price per -
Beaded Lariat with St Petersburg Stitch Pattern – Instant Download or Printed Copy
Regular price From £0.00Regular priceUnit price per -
Two Drop Peyote Stitched Cuff Pattern - Instant Download or Printed Copy
Regular price From £0.00Regular priceUnit price per -
SuperDuo Seed Pod Earring Pattern - Instant Download or Printed Copy (+ Video Tutorial!)
Regular price From £0.00Regular priceUnit price per£1.95Sale price From £0.00Sale -
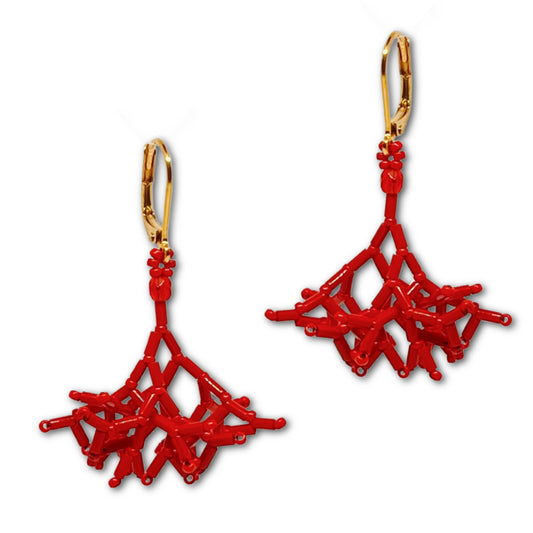
Makepeace's Mathematical Coral Earring Pattern - Instant Download or Printed Copy
Regular price From £0.00Regular priceUnit price per£1.95Sale price From £0.00Sale